By Yolan
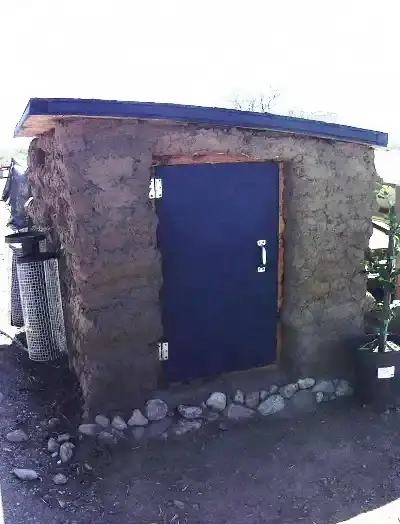 Today I'm going to show you how I built my mini-shed. You may be wondering what a mini-shed is though.
 Well earlier this year when my solar generators went out in a blaze of glory (you can read all the sordid details about that here), so did the storage container that housed them. I'd built that out of wood and while it was rather easy to build, I wanted something this time that was less flammable. Go figure ...
So for my new generator, I decided to build a storage container out of earthbags because I didn't like leaving it outside exposed to the elements. I also didn't like lugging all 50+ lbs of it up the stairs into my trailer on a regular basis. For sure that would have been great training if I was preparing for some sort of weight lifting competition, but I wasn't. So I was abundantly less than joyful about this. I digress though.
Regarding the mini-shed, I didn't want to build anything big because I didn't want to spend a boatload of time doing it. And since its primary function was to house and protect my generator, I figured that small would suffice. So out of that idea, the mini-shed was born!
It really worked out great because it's just the right sized project for a beginner and a solo builder. I would say that collectively, from start to finish (well almost finished), it took me maybe 3 weeks or so to build. Now granted, that 3 weeks was stretched out over the span of about a month and a half because I work full-time and have other things to tend to. But overall, it was very manageable.
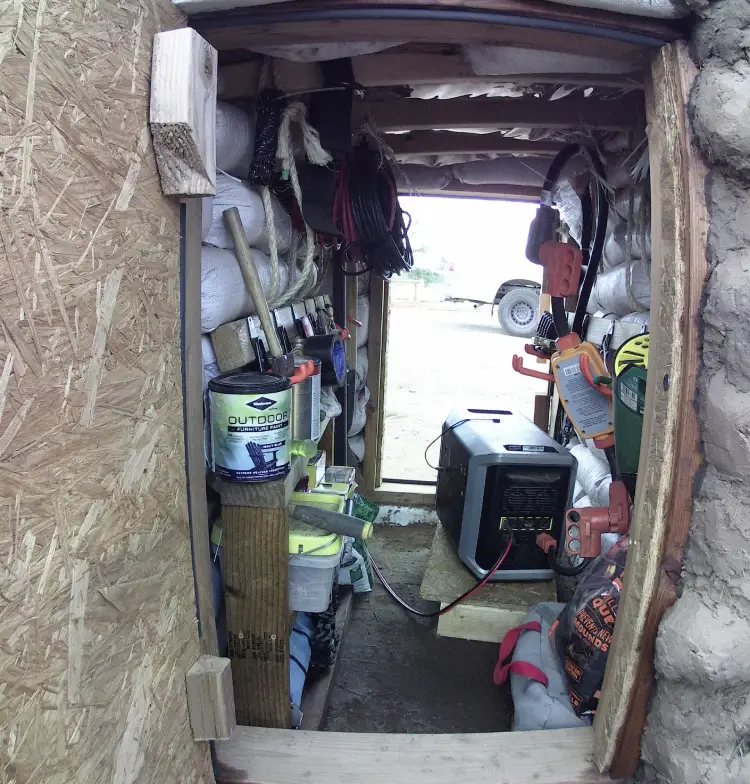
My friends and I had already built my pumphouse with earthbags, but this was my first foray into incorporating actual windows and doors into a build. I put two doors and two small windows on it. I wanted to have good ventilation through it and also I wanted to be able to have access from both sides to make it easier to get to things.
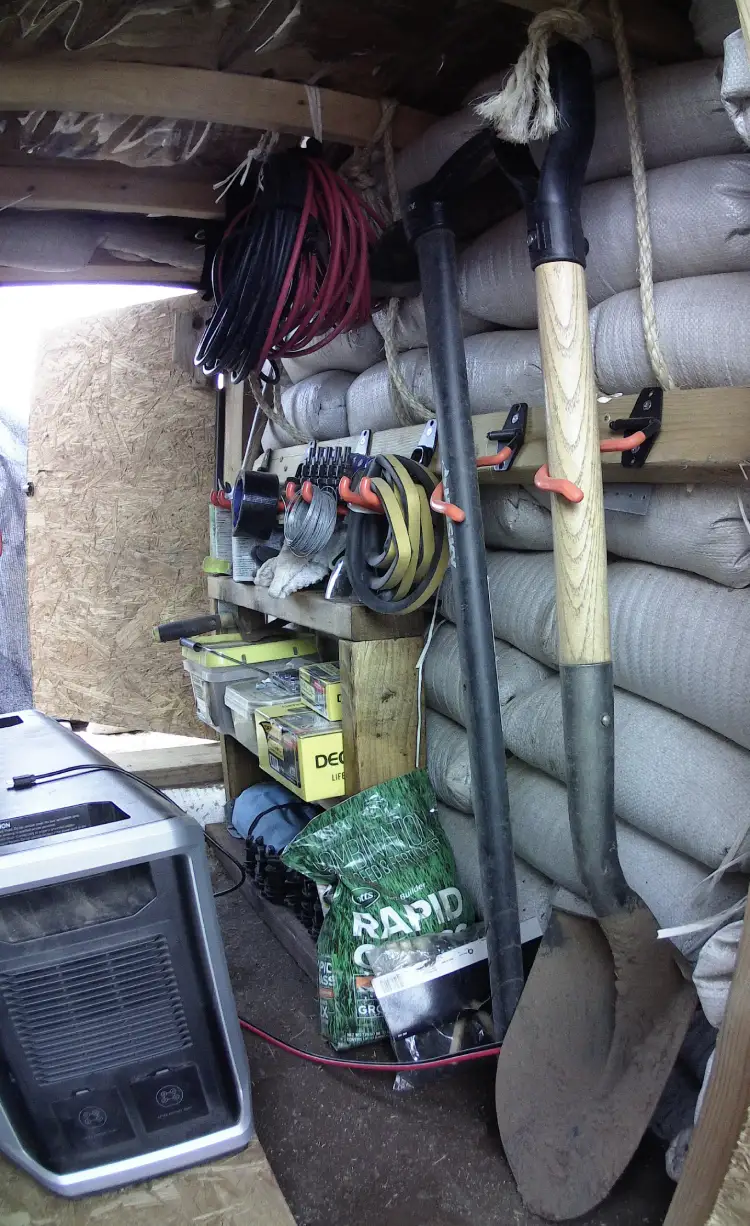
The interior size is not very big but surprisingly, I'm able to get a lot of stuff in there as you'll see in the pictures below. At the end I'll highlight the mistakes that I made which will hopefully help you to not duplicate them in your builds.
Let's jump into it:
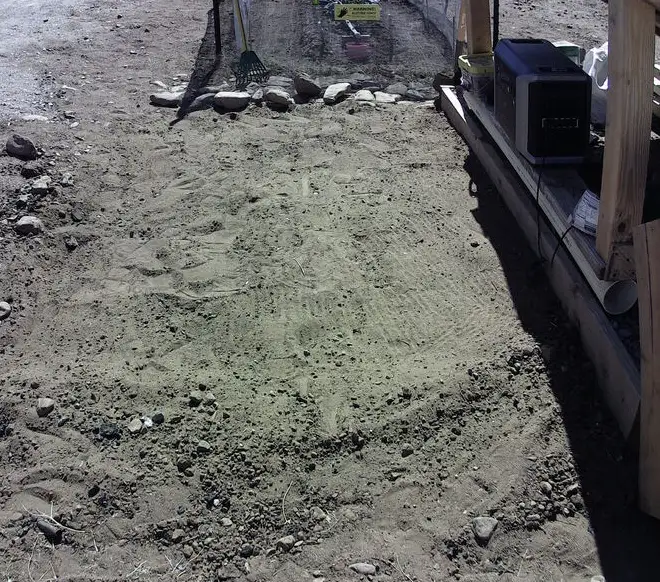
Step #1: Clear and level the area.
The area I chose was small without much wiggle room thus limiting the overall size of the structure. Since it's for my generator, I needed it to be somewhat near my panels. I suppose I could have bought longer cables but I didn't think about that at the time and why spend money that I don't have to? Small was the preference though from the beginning so it worked out fine.
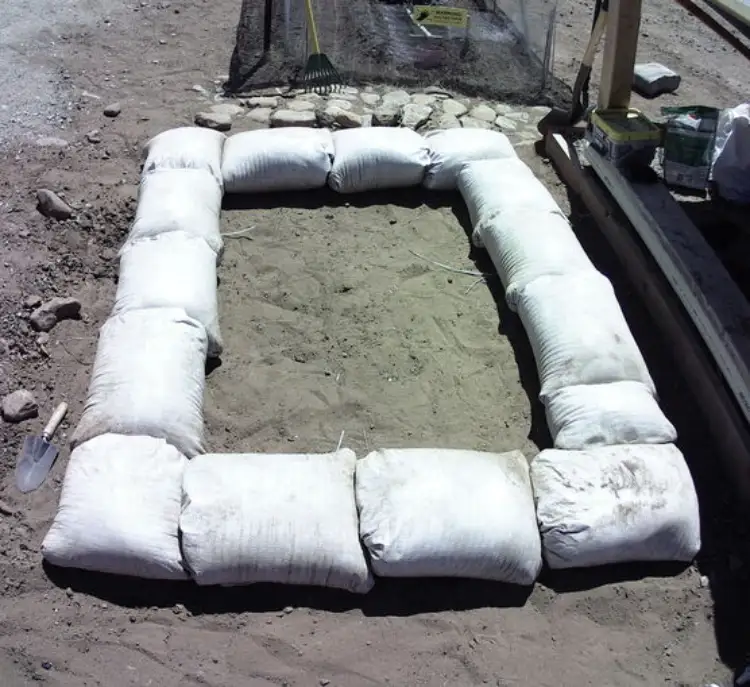
Step #2 - Lay, dampen, and tamp bags.
Ok so since this structure is small and I didn't have much 1" gravel to spare, I skipped the rubble trench foundation and the first row as gravel filled bags. Of course I would not recommend this for a home build. I have already dug the rubble trench foundation for my home and I am definitely going to start that out with the gravel filled bags.
Once again (as I did for the pumphouse build) I wet the bags after they were filled and placed. After that, I tamped them down. I got the idea from this video. I know that this is not the conventional way of doing it but I can attest that both structures came out quite solid. The jury is still deliberating on whether or not I will use this method for my home build though. One thing is for sure, this method saves a LOT of time and dry bags are lighter, of course, than wet ones so they are easier to manage.
Once again (as I did for the pumphouse build) I wet the bags after they were filled and placed. After that, I tamped them down. I got the idea from this video. I know that this is not the conventional way of doing it but I can attest that both structures came out quite solid. The jury is still deliberating on whether or not I will use this method for my home build though. One thing is for sure, this method saves a LOT of time and dry bags are lighter, of course, than wet ones so they are easier to manage.
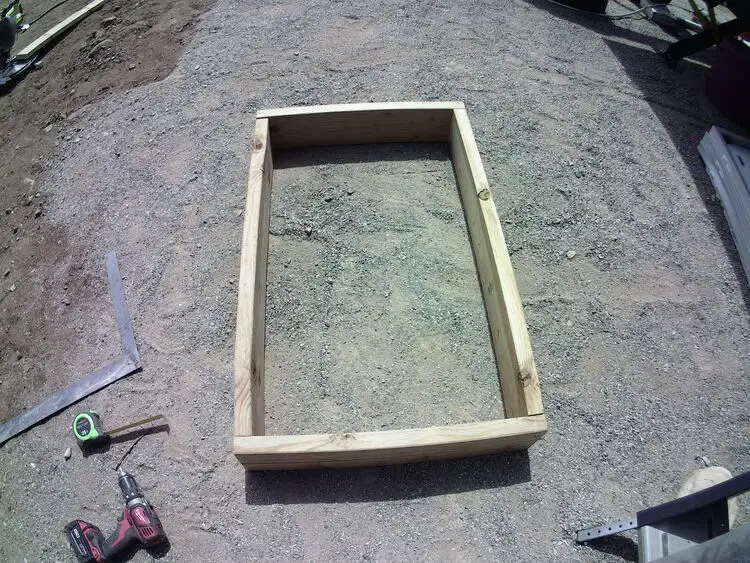
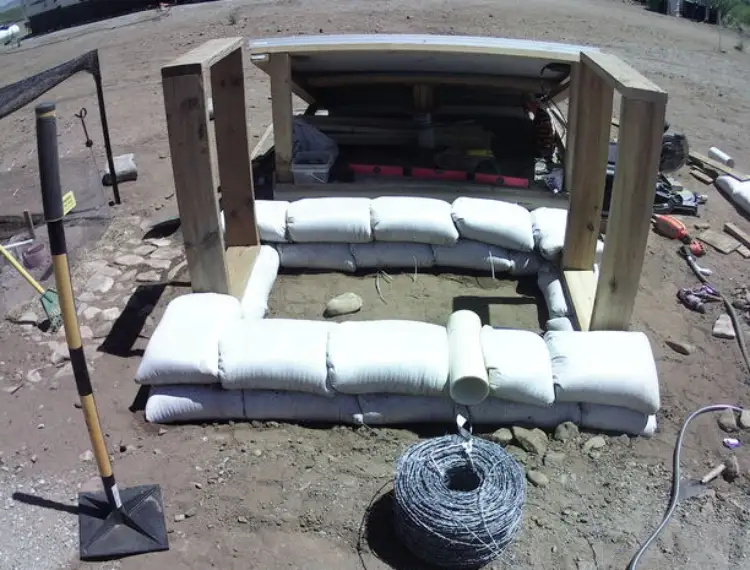
Step #3 - Put door forms / frames in place. Install door bucks
My door frames are made of 2x6's. I made frames instead of forms. With forms, I've seen where folks generally remove those when they are done and it leaves the space where the door frame will be. I just started with the frames and left them in place for the whole build. I figured if they're left in place, they would be all the more solid and anchored and they definitely are. For my home, I will likely reinforce the frames better so that they can handle the weight and pressure of the earthbags more. This guy seems to have done it well and I'll likely borrow from his method.
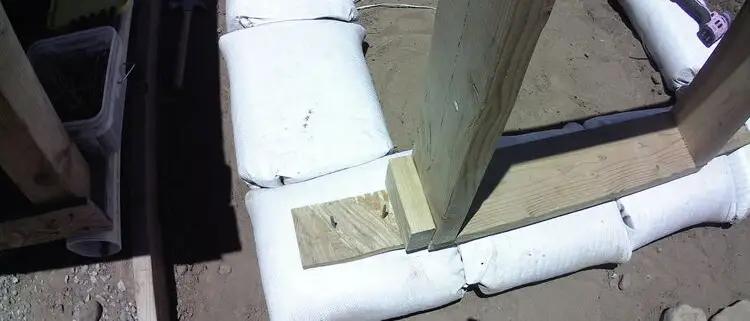
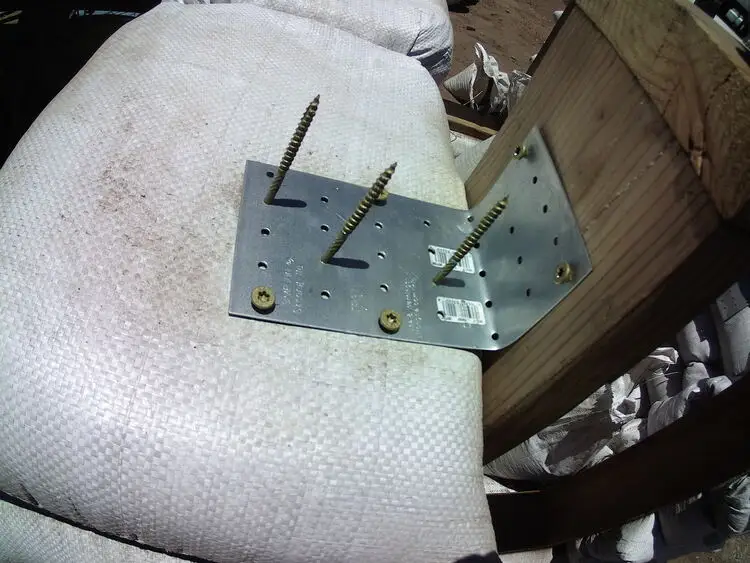
I experimented with both wooden and metal door bucks and I must say that I'm now a fond proponent of metal over wood for this. I found the wood ones to be cumbersome to fit the filled bags tightly over so that there were no gaps (which I wound up having many). With the metal, that was not a problem. I actually just used tie plates from Home Depot that I bent to a 90 degree angle for that. The wood ones I made from scrapwood.
Also, the second course up, I laid some 4" PVC pipe so that I could run cords or cables into it. After running the cords through it, I sealed it with steel wool (to keep rodents out) and spray foam.
Step #4 - Put in ropes to tie down the roof.
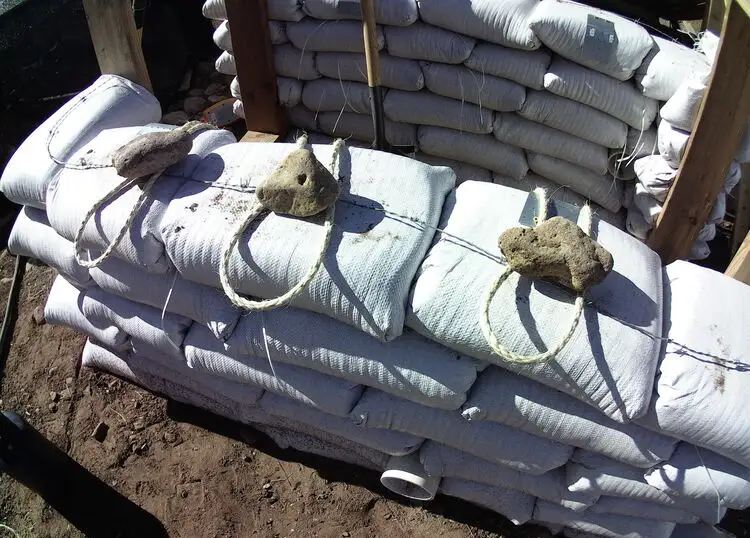
We do get a lot of wind out here and one method for making a roof more secure is to literally tie it down. So about 3 courses from the top, I laid these ropes as you can see in the pictures. I left some of the looped portion outside the walls to use for hanging miscellaneous items if needed.
Just a note that I will not be using rope for my home build. One of the guys from church, who has building experience, advised against that because the rope can deteriorate over time or rot. I will still cinch down the roof but I'll use something with a more synthetic type material that will not break down easily over time.
Just a note that I will not be using rope for my home build. One of the guys from church, who has building experience, advised against that because the rope can deteriorate over time or rot. I will still cinch down the roof but I'll use something with a more synthetic type material that will not break down easily over time.
Step #5 - Put anchor plates in place to hang things.
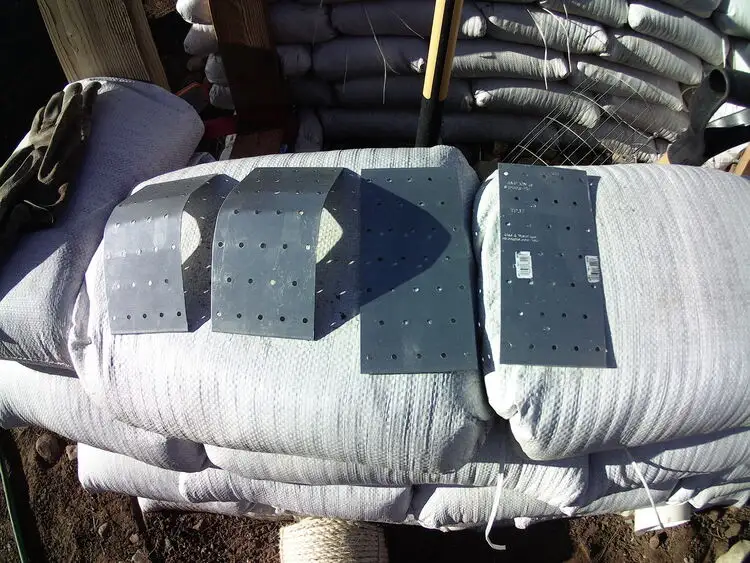
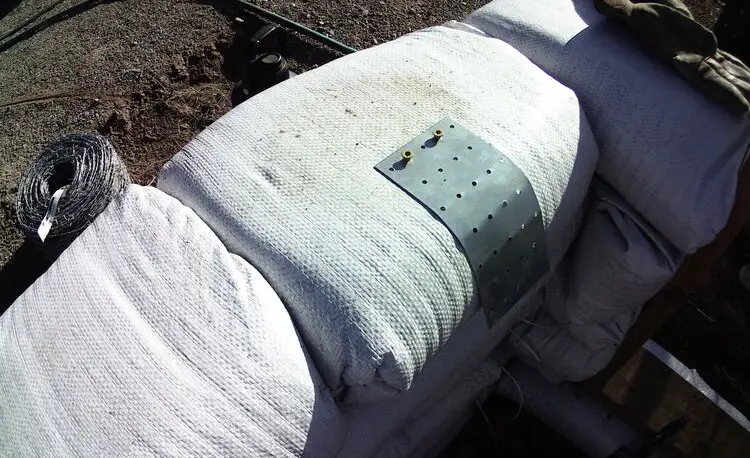
I wanted to be able to hang stuff from the walls so I put metal anchors in place for that. This will be added to my mistakes section below. I think it would have been much better and easier to use wooden anchors instead. I'll explain more in the Mistakes section but despite everything, they do work. I was able to attach 2x3's to these and place hooks in them to organize stuff. Worked out well in the end but surely would have been easier with wood.

Step #6 - Put windows in place.
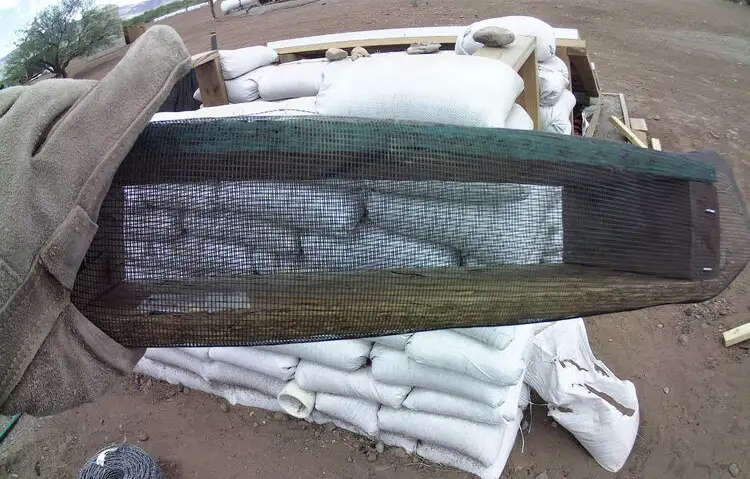
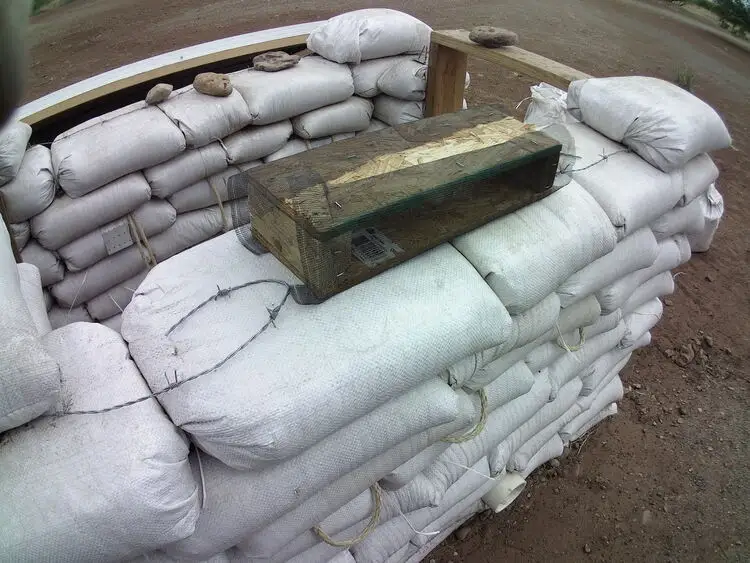
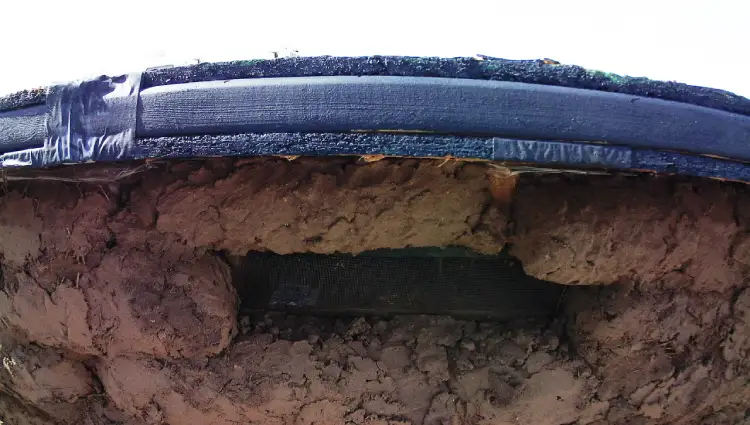
Ok so calling these windows might be a stretch. I just kind of Jimmy-rigged? Janey-rigged? up something as you can see in the pics below. Basically I made small boxes out of 2x4's and scrap OSB and stapled screens on both of the open ends. And I didn't anchor them but rather just nestled them between bags. So ya ... those are my windows. Pretty high-tech stuff I know ...
The screens will keep birds and such from making a home inside but of course spiders and other creepy crawlies can still get in. Oh well. We do live in the country. Hard to completely get away from the critters.
The screens will keep birds and such from making a home inside but of course spiders and other creepy crawlies can still get in. Oh well. We do live in the country. Hard to completely get away from the critters.

Get 5% off your next sandbag purchase from SandBaggy.com by using coupon code: OGGirls
Step #7 - Build and attach the roof.
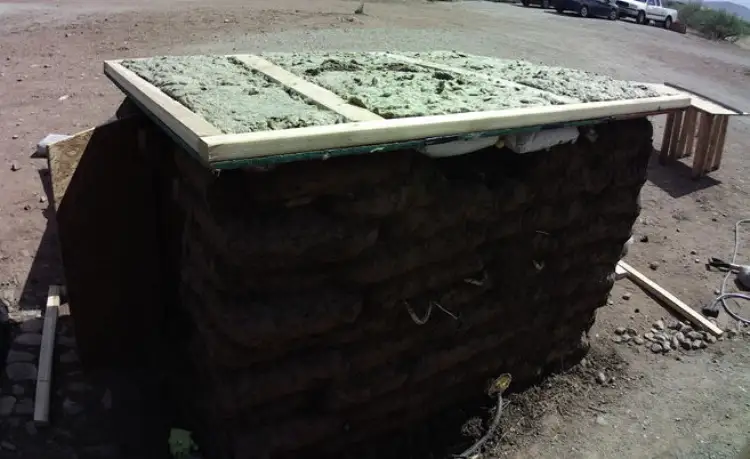
This was a biggie here. I'm not a roofer and have never done this before. I wanted a slightly pitched roof so that rainwater wouldn't accumulate on it. Also, later on down the line, I want to setup a rain water catchment system from it. So to get the pitch, I literally just tamped the last row of earthbags at an angle. I'm sure that's not the way its supposed to be done but it worked out so I'm good with it.
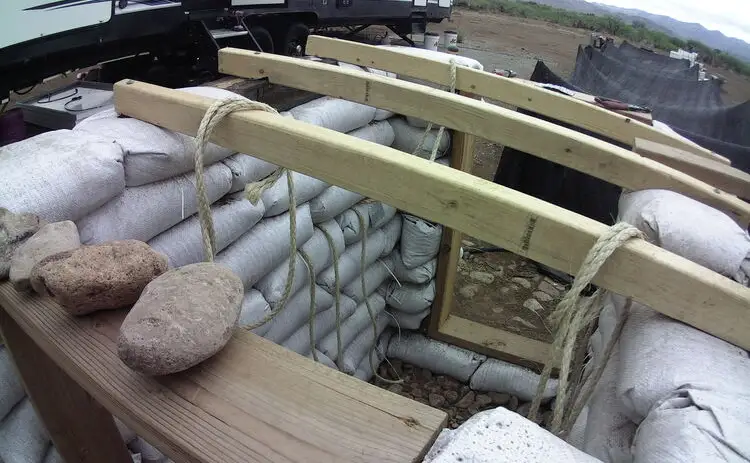
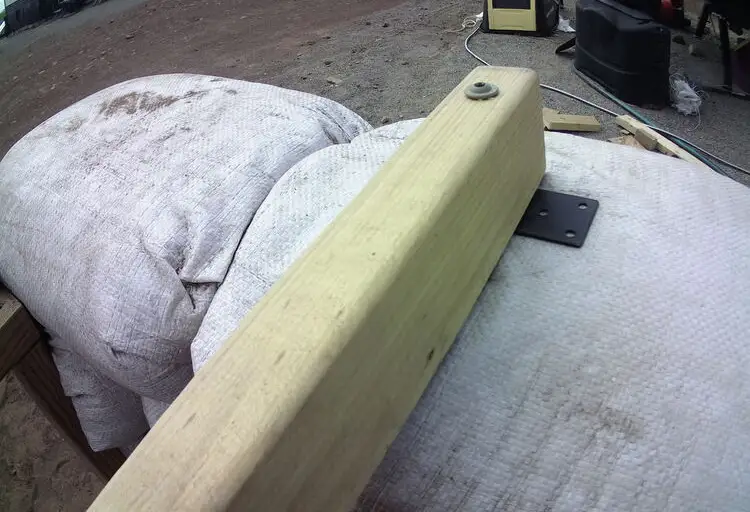
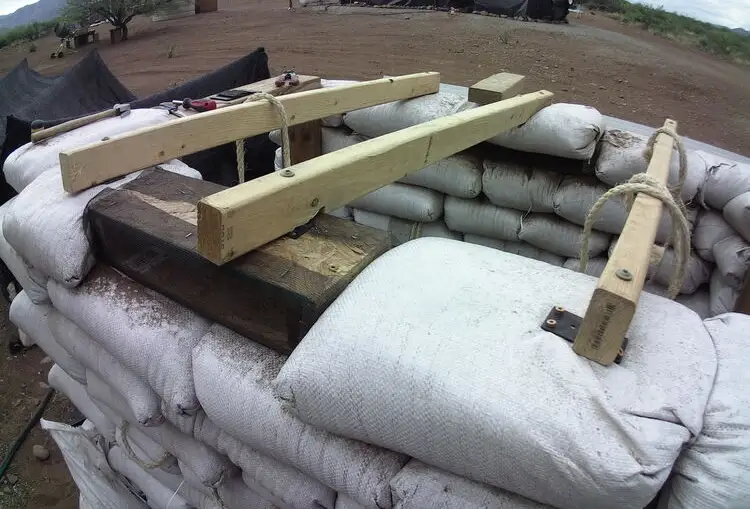
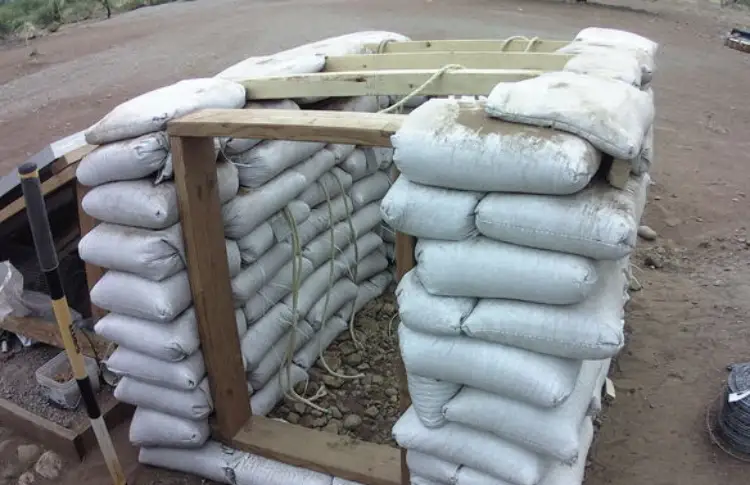
I laid the joists (I literally just learned while writing this article that, that is what they are called) which are the beams that go from wall to wall on little metal plates and secured them to the bags with 6" screws. Rebar would've probably been better but the 6" screws are what I had on hand.
![Joists in place Joists in place]()
![Joists on metal plates Joists on metal plates]()
![Joists on metal plates Joists on metal plates]()
I then snuggled them in between bags. Then I tied the ropes around them to anchor them down even more. I got help from Ally and Meena for this part because I'm not that great at tying really good knots.
![Ropes over joists Ropes over joists]()
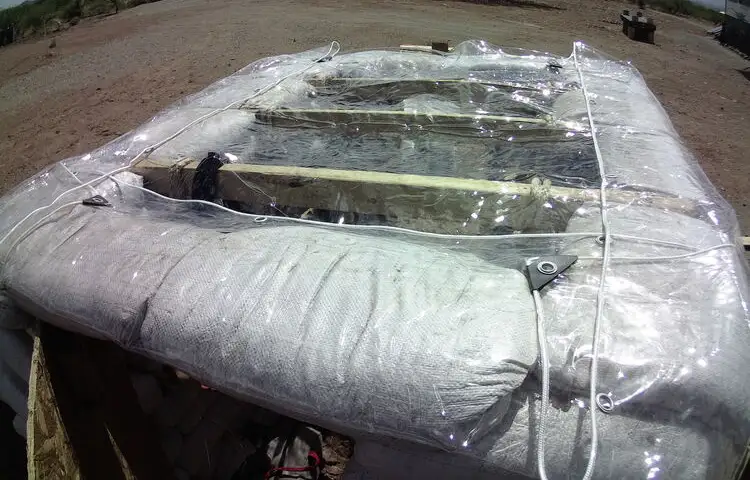
Once those were secure, I laid 20 mil PVC vinyl over it for waterproofing. I don't know much about this, but Ally's brother-in-law did this for the shed that he and his wife built for Ally's mom and there have been no leaks.
![20 mil plastic over joists 20 mil plastic over joists]()
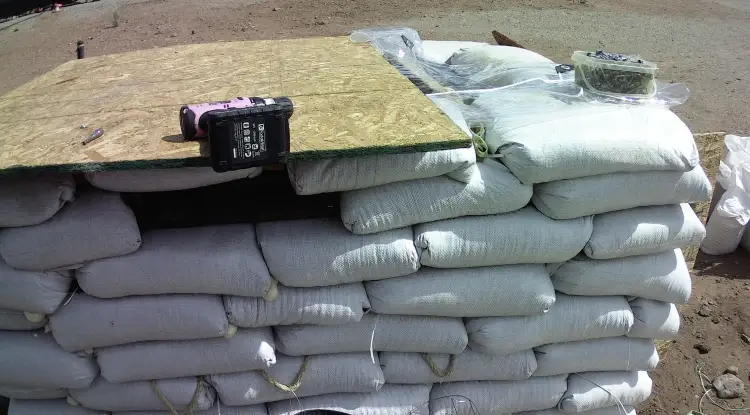
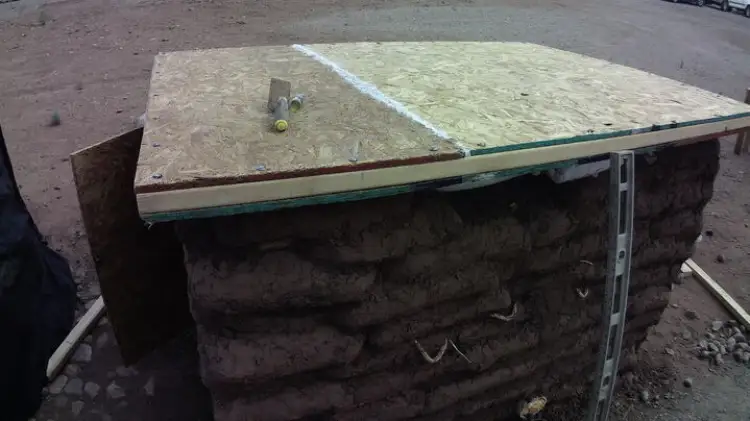
After that, I screwed OSB panels on the joists.
![OSB screwed to joists OSB screwed to joists]()
The roof is 5x6'. I wanted an overhang but OSB comes in 4x8' panels. So that meant I had to cut it which resulted in a seam where the two boards met. For that I used Flashing tape. I was going to leave it like this but then decided that I wanted to insulate it. Meena had some leftover insulation from her shed that she let me have. So I built a frame on the already screwed down OSB and stuffed it with insulation, then laid more OSB over that and screwed it down. This time though, for the seam, I used JB Water Weld. Then after that dried, I put on the flashing tape.
So far, I've detected no leaks!
I laid the joists (I literally just learned while writing this article that, that is what they are called) which are the beams that go from wall to wall on little metal plates and secured them to the bags with 6" screws. Rebar would've probably been better but the 6" screws are what I had on hand.
So far, I've detected no leaks!
Step #8 - Build and install doors.
I really messed this up. Did I mention already that I'm not a carpenter? The studs (the 2x6 wood beams) that I used for the door frames were slightly warped. It's hard to get things square when the wood is in that condition but that's what I had so I just did what I could to make it work. So I had to finagle the doors to get them to fit. There was a lot of trial and error in this process. I was even using a chisel and a hammer to try and get it right.
In the end, I wound up with air gaps. So I put some weatherstripping in place and I also nailed a piece of leftover OSB onto the frame where the gaps were. I didn't insulate the doors so they are just one piece of OSB. I will likely replace them somewhere down the line as I'm not super pleased with how they came out. But hey, they're functional, they open and close.
In the end, I wound up with air gaps. So I put some weatherstripping in place and I also nailed a piece of leftover OSB onto the frame where the gaps were. I didn't insulate the doors so they are just one piece of OSB. I will likely replace them somewhere down the line as I'm not super pleased with how they came out. But hey, they're functional, they open and close.
Step #9 - Create an earthen floor.
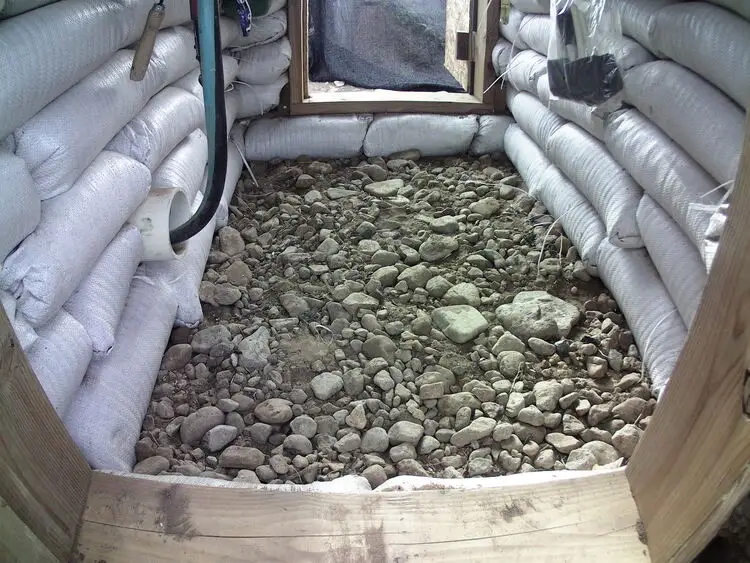
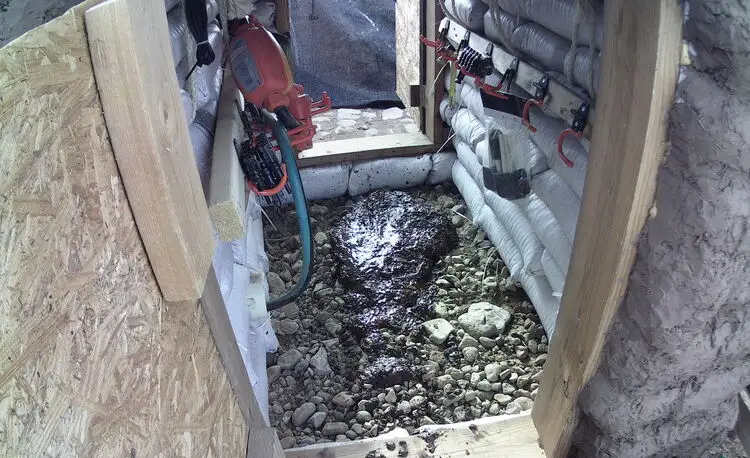
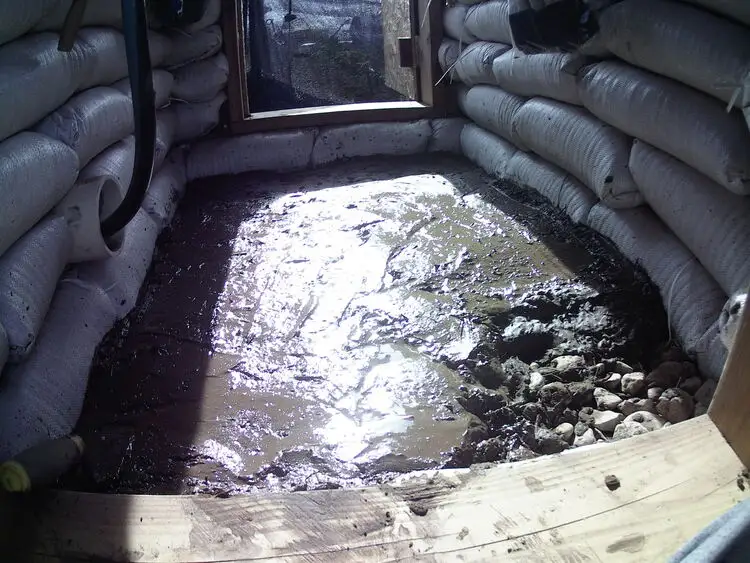
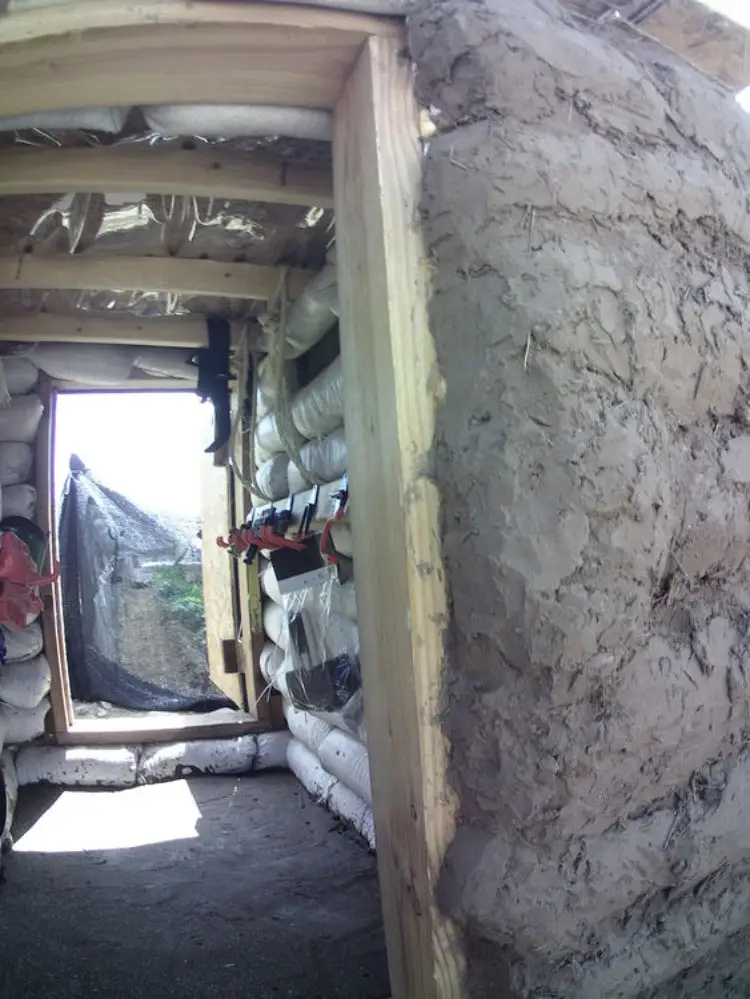
My original plan was to just have a rough gravel floor but I found it hard to move stuff around over the rocks, so I decided to do an earthen one instead. I removed the bigger rocks and tried to keep the smaller and / or flatter ones. Then I mixed together the same materials that I used for the plaster ... sand, straw, and water. I shoveled it in over the rocks and smoothed it out with a trowel. Then I left both doors open to let it dry.
Step #10 - Make furniture.
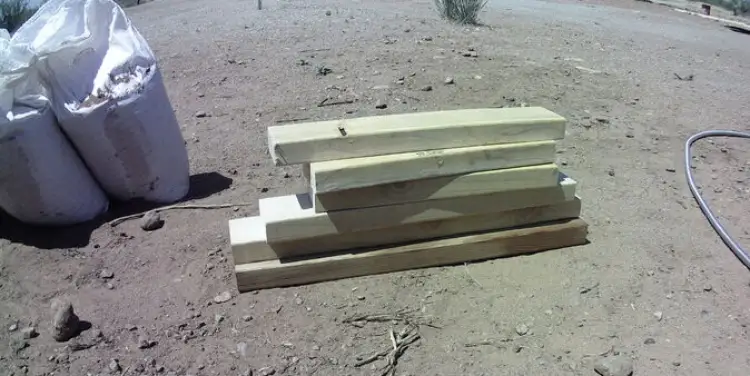
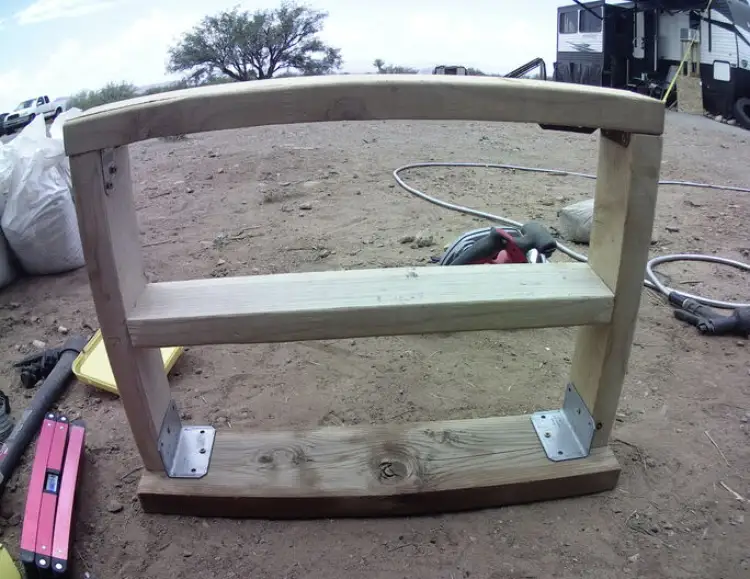
I want my mini-shed to be organized and not just have stuff thrown around in it, so in addition to the hooks, I thought it'd be good to have some shelves as well. Using a bit of scrapwood that I got from Ally and some newer studs that I had, I built this little two-shelf case that fits perfectly inside. I had some brackets leftover from a different project and was able to put them to use here. I stained it using equal parts of diesel fuel and used motor oil.


Step #11 - Plaster and Paint
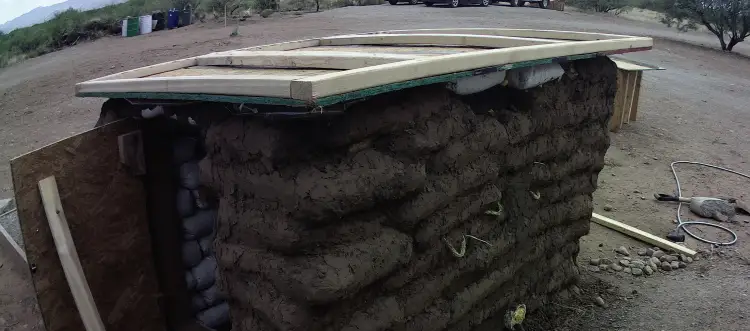
I actually started the plastering before I attached the roof. The first coat is made from a mixture of broken straw, sand, and water. The second coat is stabilized .. its made from sand, water, and emulsified asphalt. This is to make it so that it needs less maintenance. A pure earthen plaster will wear or wash away with a greater frequency than a stabilized one. This has already happened with my pumphouse.
I must say, plastering is a lot of work! Granted, you're not lifting any heavy earthbags but it still can take quite a bit of time. Especially if you want a smooth wall. That is my goal and as you can see from the pictures, I have not attained to that yet. But I hope to. It just takes more time.
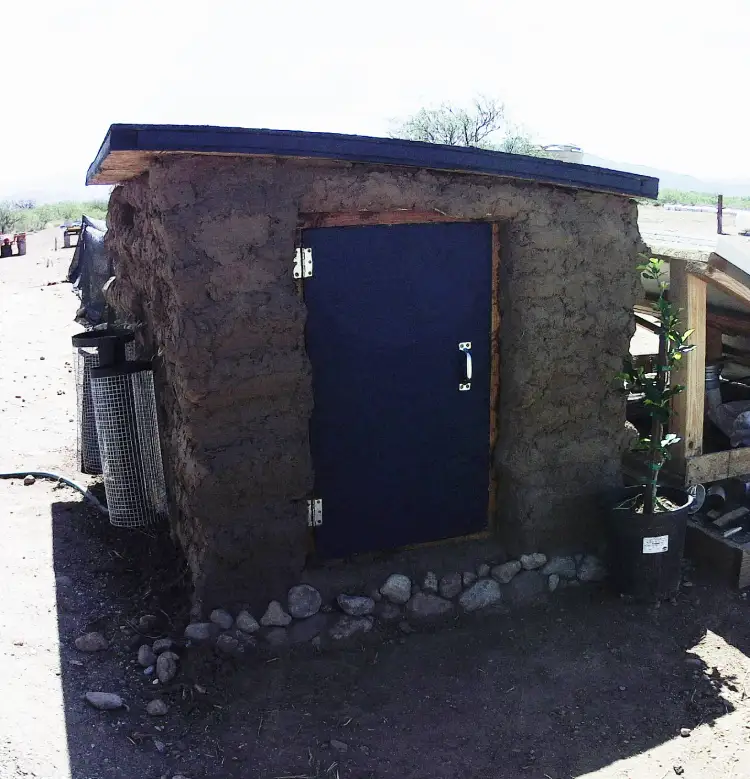
I was thinking to paint the roof a dark blue and the exterior walls a lighter shade of blue but after I painted the roof, I really liked the look of the brown plastered walls contrasted with the navy roof so I decided not to paint the exterior walls at all.
And walla! Presenting ... (drum roll please) ... the mini-shed!
Ok, yes I know its not perfect. That is obvious from the picture but ... it works! I decided not to plaster the inside as this was meant to be just a quick project and since the inside walls won't be exposed to the sun, there is no real need for it. For my home, yes the interior walls will definitely be plastered.
My Mistakes
What follows is the proverbial bloopers reel in text form ...
One of my co-workers used to jokingly say, "I thought I was wrong once, but it turns out I was mistaken", lol. Well I was wrong a lot in this build. But, this was such great practice. I'm really grateful for all the things I learned along the way and I'm happy to have made the mistakes here so that hopefully I will not do such with my home.
1. I did not tamp the sides of the bags flat.
Basically when you tamp your bags, they will bulge out some on the sides. If you leave those as is, the ridges between courses will be more pronounced and thus require more plaster to smooth out. So next time, I know to use a piece of wood or something to flatten the bags on the sides.
2. I did the wall anchors wrong.
I cut some sheet metal with tin snips, bent it, and placed it between a course. The plan was to screw a wooden beam onto this and then hang stuff from that. Afterwards, I didn't feel like this was the sturdiest way to do it. I think it would have been better to embed wood blocks in between the courses and then I could just attach stuff to that.
3. I did not make sure that my bags were tightly packed together.
This resulted in many air gaps between the bags. This is not good. I filled those gaps in with spray foam but I surely would not want this to occur on my home build.
4. I filled my bags too full.
When the bag is too full it seems to come out a bit rounded even when you tamp it. I think this is partially why there were so many air gaps.
5. I should have cut the ropes for the roof tie down longer.
It was kind of hard to get a good knot tied in because I didn't give enough slack for that.
The conclusion of the whole matter
Overall, this was a fun project. I'm really thankful to have been able to do it and for God's protection while lifting over a hundred 40+ lb bags. I would recommend that anyone who is considering building with earthbags, to start out with something small and manageable. Don't let your house be your first project. That's kind of daunting and you will make mistakes. Its better to do that on something smaller and not as critical as your home.
Also a small structure like this could be tweaked to be used for other things. I was thinking that I could have built it a couple of feet into the ground, removed the windows, and made it into a small root cellar. Or it could be made into a playhouse if you have kids. Its versatile.
I hope that you enjoyed this how-to and that it was helpful. God's rich blessings to you!